Create a dreamy oasis with a stunning DIY bed canopy using Sherwin Williams white paint. Elevate your bedroom with this elegant project.
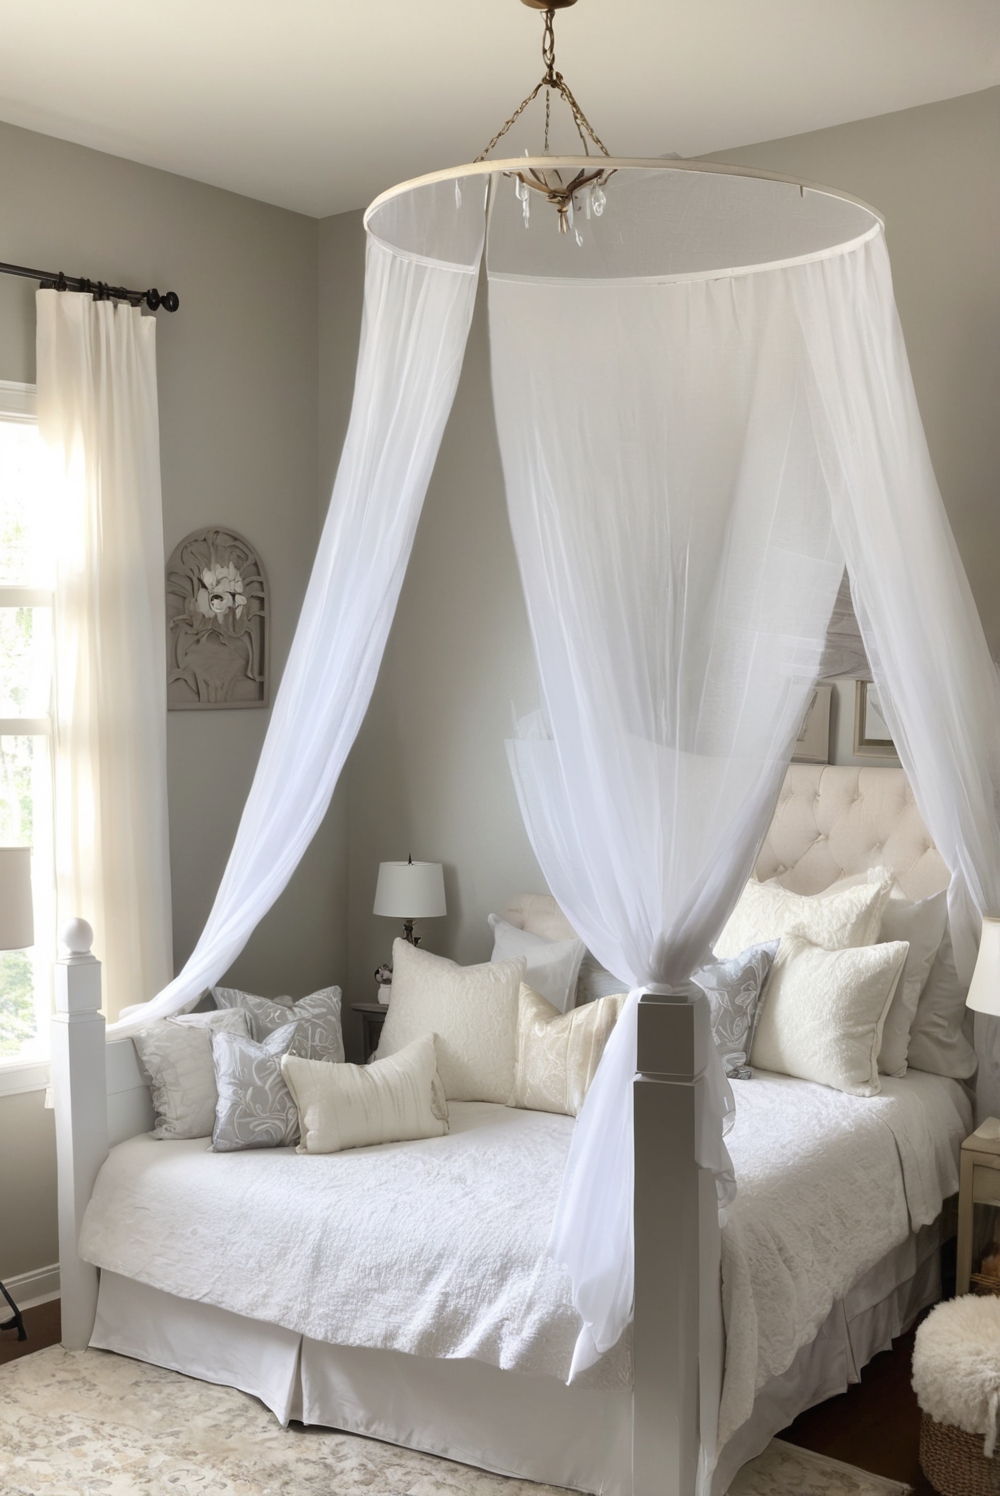
An elegant DIY bed canopy using Sherwin Williams White Paint can transform a bedroom into a luxurious sanctuary. By incorporating this simple yet stylish project, you can add a touch of sophistication to your space. To create this canopy, start by selecting a suitable bed frame or ceiling mount. Then, choose a high-quality Sherwin Williams White Paint that complements your existing decor. Begin by painting the designated sections and allowing them to dry thoroughly. Once the paint has cured, assemble the canopy according to the instructions. The result is a beautiful and chic addition to your bedroom that exudes a sense of luxury and style.
Creating an elegant DIY bed canopy using Sherwin Williams White paint can be a wonderful project that not only adds a touch of sophistication to your bedroom but also allows you to showcase your creativity. Here are some tips and steps to guide you through the process:
Choosing the Right Fabric:
When selecting fabric for your bed canopy, opt for materials that are lightweight and flowy. Sheer fabrics like chiffon, tulle, or organza work well for creating an ethereal and romantic look. These fabrics can be easily draped and gathered to form a canopy that cascades beautifully over your bed.
Attaching the Bed Canopy to the Ceiling:
To securely attach the bed canopy to the ceiling, consider using ceiling hooks or hardware specifically designed for hanging curtains or canopies. Make sure to anchor the hardware properly to ensure that the canopy is safely suspended above your bed.
Creating a No-Sew Bed Canopy:
If you prefer a no-sew option, you can achieve a stunning bed canopy using fabric adhesive, fusible bonding tape, or even a hot glue gun. Simply cut the fabric to the desired size and shape, then use the adhesive or tape to hem the edges and create a rod pocket for hanging.
Benefits of DIY Bed Canopies:
– Personalized and customizable design
– Cost-effective compared to buying a pre-made canopy
– Opportunity to showcase your crafting skills and creativity
– Adds a touch of luxury and elegance to your bedroom decor
– Can be easily tailored to suit your style and preferences
Creating a Romantic Ambiance:
To enhance the romantic ambiance of your bedroom with a bed canopy, consider adding string lights, fairy lights, or LED candles along the canopy edges. Soft, warm lighting can create a cozy and intimate atmosphere that is perfect for relaxation and unwinding.
Ensuring Safety:
When crafting a DIY bed canopy, safety should be a top priority. Make sure that the canopy is securely attached to the ceiling and does not pose a risk of falling or tangling. Avoid using materials that are flammable or pose a hazard, especially if you plan to include lighting elements.
Why Choose DIY Over Pre-Made Canopies:
Many people opt for DIY bed canopies over pre-made options because of the creative freedom and customization it offers. DIY projects allow you to tailor the design, size, and fabric choices to suit your personal style and decor preferences. Additionally, creating your own bed canopy can be a rewarding and fulfilling experience that adds a unique touch to your bedroom space.
In conclusion, creating an elegant DIY bed canopy using Sherwin Williams White paint can be a delightful project that transforms your bedroom into a sanctuary of sophistication and romance. By following these tips and steps, you can craft a stunning canopy that is not only visually appealing but also reflective of your individual style and creativity. Enjoy the process of designing and constructing your bed canopy, and revel in the cozy and enchanting ambiance it brings to your sleeping space.